

this tutorial was created by Sharon Becker
on 14th April 08
It was written for those that have a working
It was written for those that have a working
knowlege of PSP
This tut was done in PSP X
this is how i made the item,
This tut was done in PSP X
this is how i made the item,
found it by playing around in psp,lol.
my ideas, my concepts, any similarities
are purely coincidental,
do not claim as your own.
You will need the following supplies:
PaintShopProX
EyeCandy5-impact
Okay lets start:
1.file- new file400x400
2.now go to preset toolsand click on circle
3.make sure your foregroundcolour is null
You will need the following supplies:
PaintShopProX
EyeCandy5-impact
Okay lets start:
1.file- new file400x400
2.now go to preset toolsand click on circle
3.make sure your foregroundcolour is null
and backgroundis to a grey #c0c0c0
(we're doing it grey so u don't have to
keep making individual ones,you make a grey one
and then you just colourize it)
4.draw out your shapeand convert to raster
5.now go to effects-distortion effects -wave
4.draw out your shapeand convert to raster
5.now go to effects-distortion effects -wave
with these settings:
Horizontal & Vertical Amplitude
both set at 2
Horizontal & vertical wave
length both set at 34
click ok
6.now with preset shape - circle
6.now with preset shape - circle
draw out a circle but leaving abit
of room at sides then go to
selections - float - defloat
hit delete on this layer and
then highlight you distorted
layer and hit delete
9.now with this layer
9.now with this layer
apply effects-eyecandy5-impact-bevel with these settings:
10.on first sections
10.on first sections
is called *settings*do not do anything with this one
11.then on *basic* heading, click on this
11.then on *basic* heading, click on this
and apply these settings
Bevel width 74.74bevel height 56
smoothness 41.05round corners 5
inside selection checked
darken deep areas 0
shadow interior - none
12.now on the next heading *lighting*apply these settings
12.now on the next heading *lighting*apply these settings
direction 129inclination 73highlight brightness 60
highlight size 75highlight colour #c0c0c0
shadow colour #808080
click ok and you should have something
like this

13.now draw a circle with preset shape again

13.now draw a circle with preset shape again
this time draw inside the gap of your wax seal
and make it just go over the sides
14.now we go back to eyecandy5 - impact-bevel
14.now we go back to eyecandy5 - impact-bevel
and apply these settings:
in the *settings* heading
find the *sharpe edge*on mine its the last in the list
15.*basic* heading, leave as is
16.*lighting*direction 135inclination 45
15.*basic* heading, leave as is
16.*lighting*direction 135inclination 45
highlight brightness 69
highlight size 50
highlight colour white
shadow colour #adabab
click ok
it should look like this:

17.in the layers pallet
right click and duplicate that layer
then go to image - resize to 300
so its a 100 less than it was
18.merge all layers visible
there you have it...
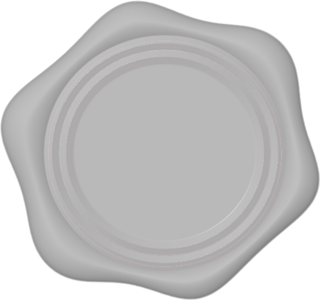
save how you would normally
18.merge all layers visible
there you have it...

save how you would normally
(i saved mine in png)
and now you can colourize it to taste!
heres mine recoloured

then all you do is add a ribbon to make it funky,lol.
Hope you enjoyed my tutorial!

then all you do is add a ribbon to make it funky,lol.
Hope you enjoyed my tutorial!
No comments:
Post a Comment